
A localhost install is also more secure and provides an ideal testing environment on your computer, away from prying eyes or hackers.
We originally published a version of this post in mid-2014 and it quickly became one of our top 10 posts with well over 150 comments. Since then, XAMPP 5.6.15 is now available and Windows itself has undergone a few updates. So here’s a shiny new updated guide on how to set up XAMPP on Windows, with added information on how to get around pesky firewall and port issues.
What is XAMPP?
XAMPP stands for cross-platform, Apache, MySQL, PHP and Perl. It’s a simple and lightweight solution that allows you to create a local web server for testing purposes.
Since XAMPP is cross-platform, it also works on Mac and Linux, but today we’re going to focus on how to set up XAMPP on Windows 10.
WordPress isn’t a stand-alone application and requires server software in order to run. XAMPP provides the necessary environment needed to run WordPress on a local machine.
Download XAMPP:
Go to the Apache Friends website and download XAMPP.

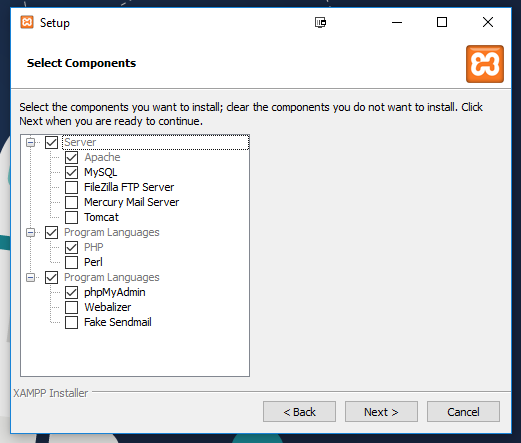
Installing Xampp:
The XAMPP file is 109MB. Once downloaded, launch the installer.
During the install process, you may receive warnings such as Windows asking you if you’re sure you want to install the software and the installer prompting you about antivirus software. As you would when installing any software on Windows, use your best judgment, but you probably want to click “Yes” to continue with the install.
The XAMPP setup wizard will guide you through the installation. Click Next.

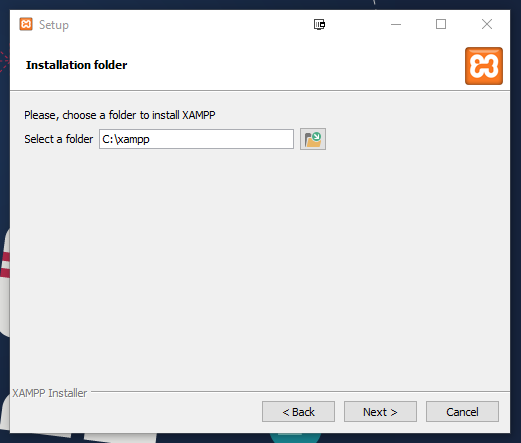
Going with the default directory is usually the best idea:
After this step it will ask you to choose your were you want to install xampp:
In the next step, you will also learn about the possibility to install WordPress easily through Bitnami’s own “script stacks.” We’ll take advantage of that in a minute. For now, just begin the installation by clicking on “Next.”
Note. During the installation, you might get asked to allow the components of the server to bypass the system firewall. This is a required step to make the server work.
After the installation is done, you’ll have a functioning web server on your computer.
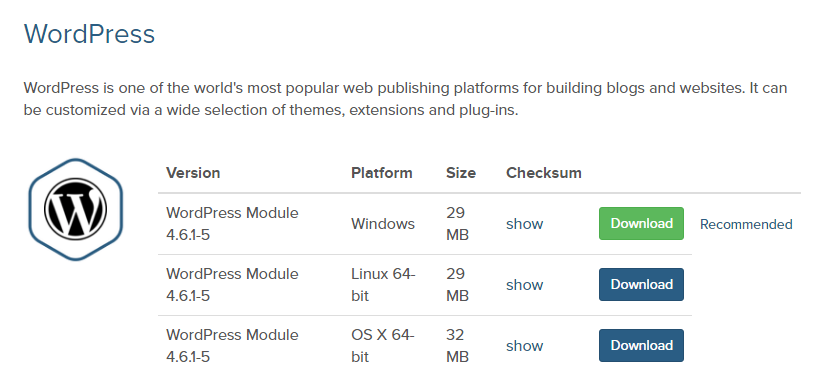
3) *Actually* install WordPress locally:
Go to this page, and download the current recommended WordPress installer:
Once you have it, just double-click it like any other installer package.
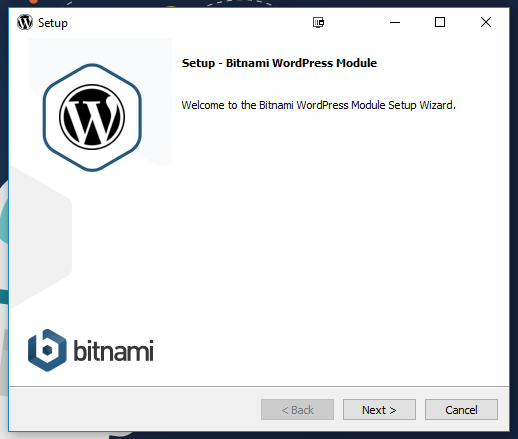
Select the location of the XAMPP installation and click “Next.”
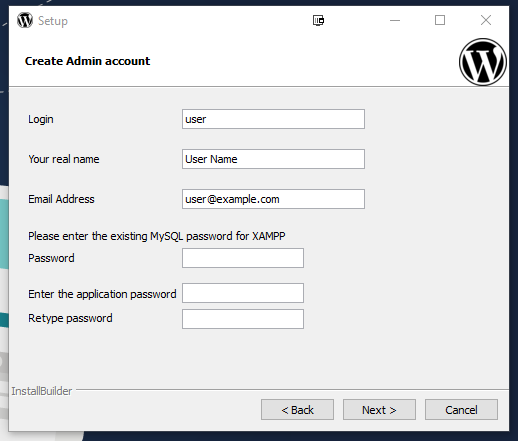
The installer will ask you about your WordPress setup parameters:
.Username, real name, email – basic stuff.
.You can leave the database password blank.
.“Application password” is your WordPress dashboard password.
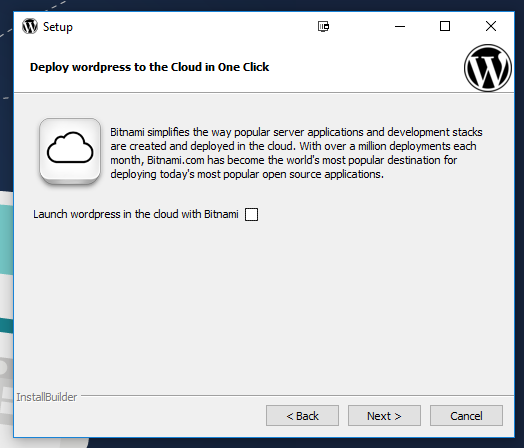
In the last step, you can uncheck the option to install WordPress in the cloud:
After that you can sit back, relax and let the wizard install WordPress locally for you.
When the installation is done, you can pretty much already see your site if you point your browser to:
http://localhost/wordpressAlso, you can log in normally by going to http://localhost/wordpress/wp-admin
If you want to work with your site files manually, you can find them in:
At this point, you can start working on your site locally, and then export it to the live setup once you’re done. Here’s how:
4) Export to the live setup:
You can use the All-in-One WP Migration plugin for that.
Once you activate it, go to your Dashboard >> All-in-One WP Migration >> Export:

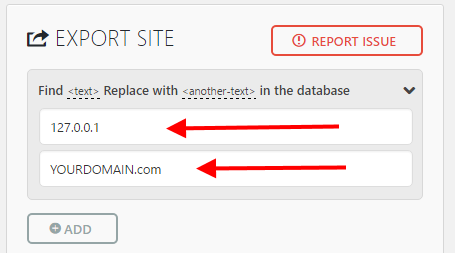
There, you can do one neat thing prior to exporting the site – search and replace specific texts in the database.
For example, find all instances of your local IP and replace it with your live domain. Like so:
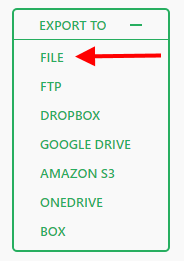
Lastly, just select where you want the site exported. I usually go with “file”:
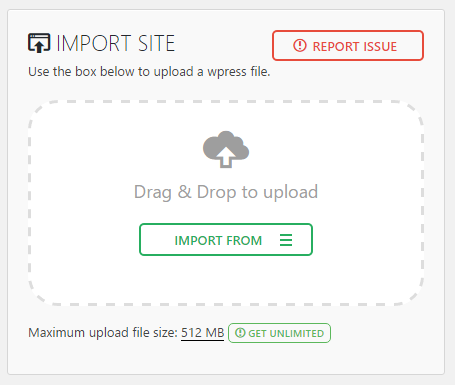
The last step is to take that export file, install the All-in-One WP Migration plugin on your live site, and go to the import section of the plugin there:
And that’s it. You’ve just managed to install WordPress locally, handled your development in a safe environment, and rolled out the changes to the live site.


0 comments:
Post a Comment